


Step 1
Draw a letter, take a picture of the sketch and place it into your Photoshop document.
Use the Pen tool to create the lettering shapes and fill them with color.
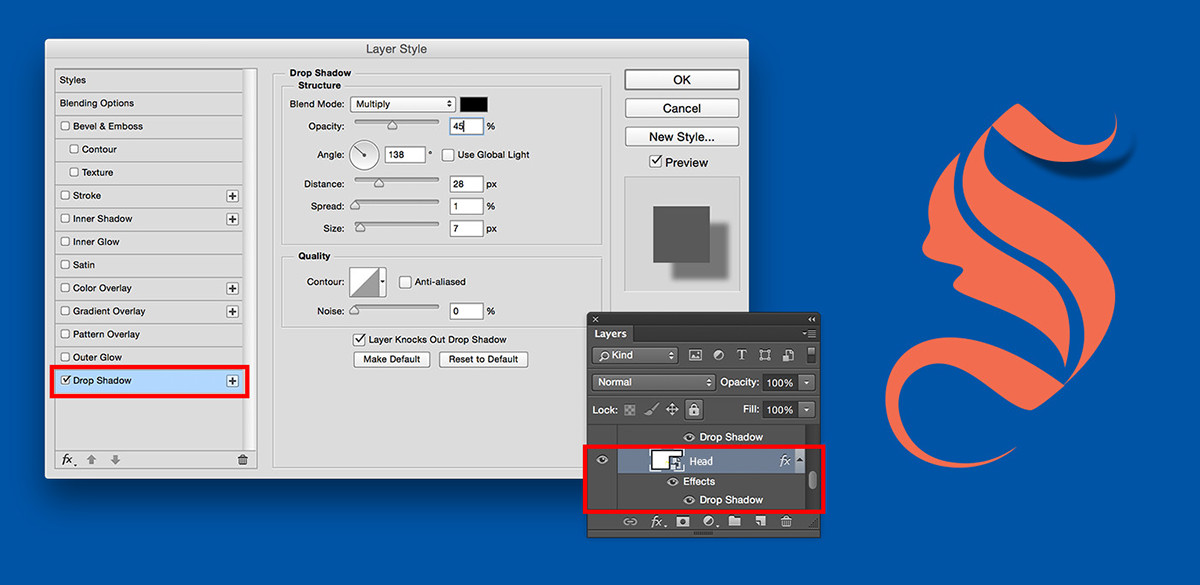
Step 2
To add a shadow to the top part of your letter, double-click its layer in the Layer panel and choose Drop Shadow. Adjust the settings to achieve the desired effect. Uncheck the Use Global Light checkbox.
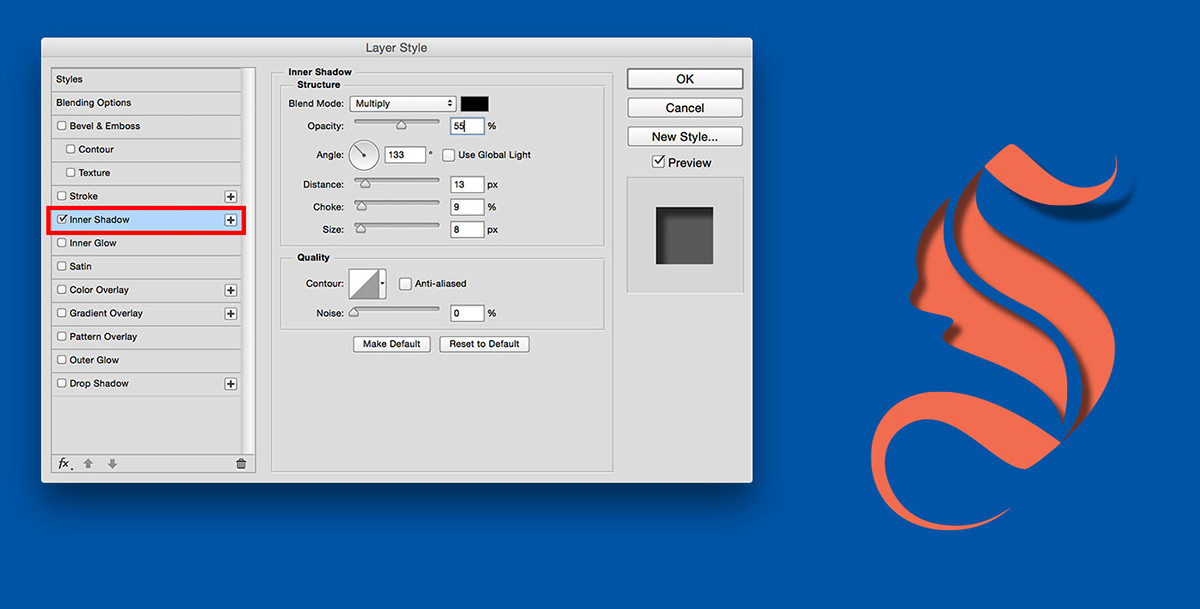
Step 3
Add Inner Shadow to the center part of your letter.
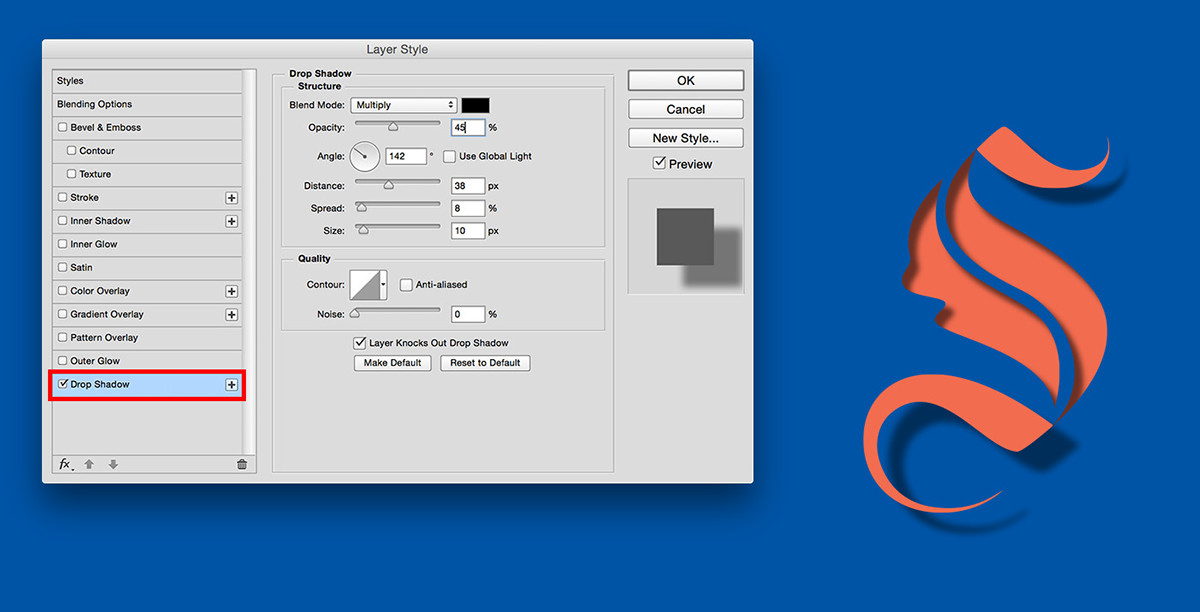
Step 4
Repeat Step 2
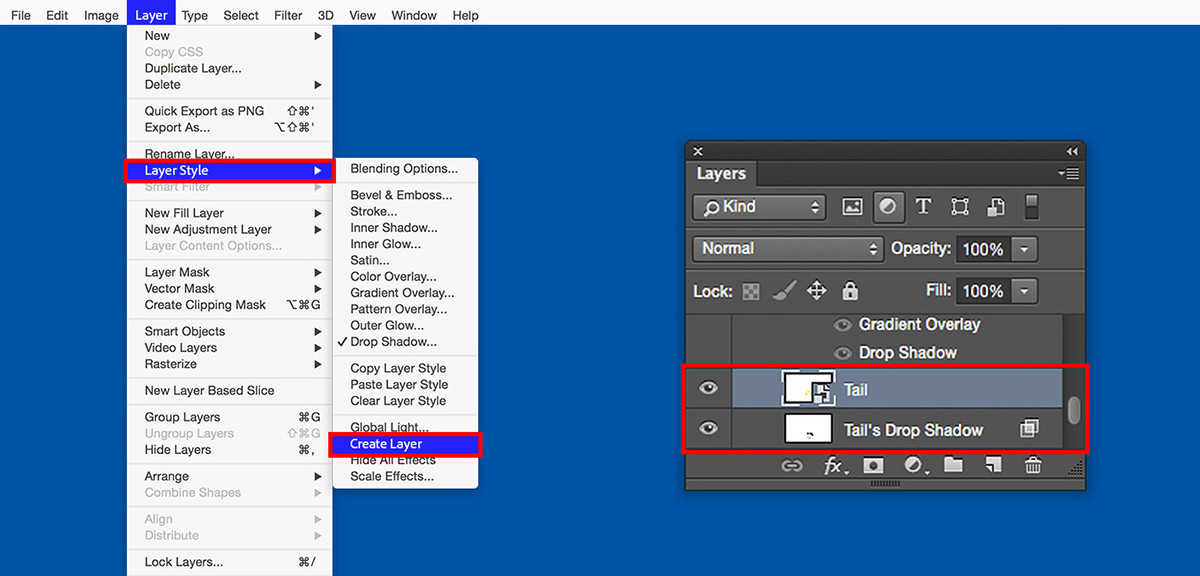
Step 5
To edit the shadow separately from the fill layer, go to Layer > Layer Style and choose Create Layer. In the Layer panel you’ll now have two layers: a shape layer and a Drop Shadow layer.
Step 6
Use the Eraser tool to remove parts of the shadow.
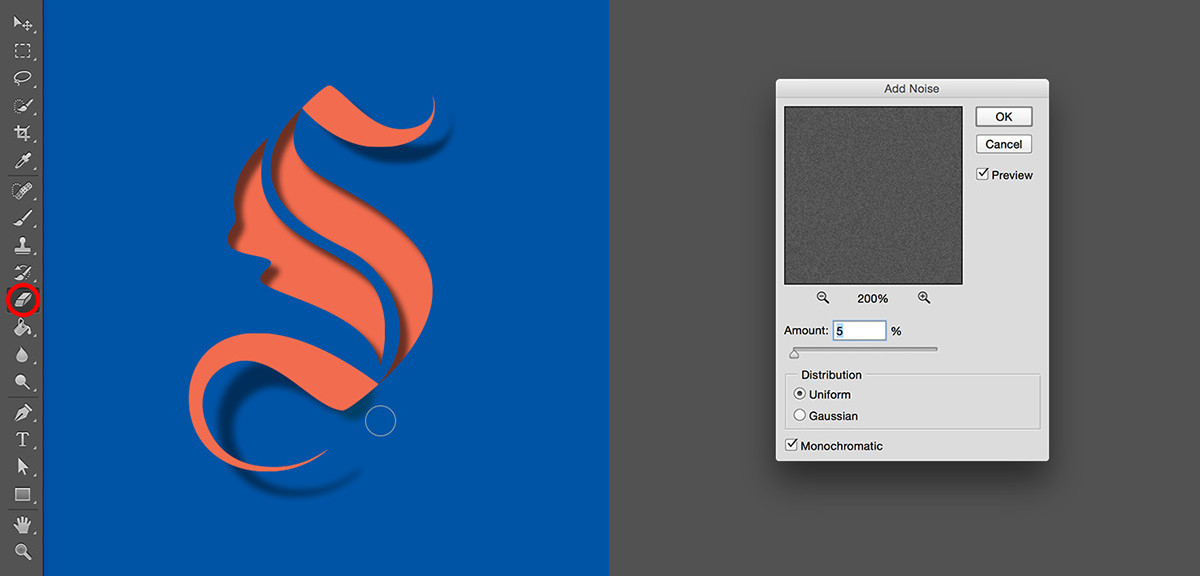
Next, let’s create a grainy paper texture. Make a new layer and fill it with grey color. Then go to Filter > Noise > Add Noise.
Next, let’s create a grainy paper texture. Make a new layer and fill it with grey color. Then go to Filter > Noise > Add Noise.
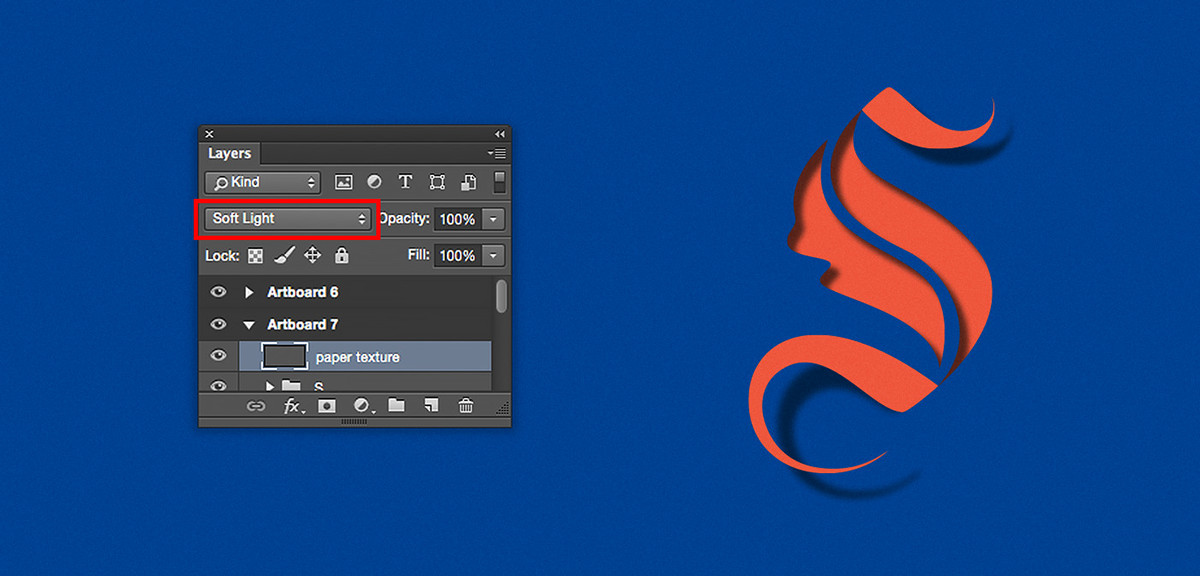
Step 7
To add a paper texture feel to your image, choose Soft Light in the Layer panel.


